Wondering how to build a horse arena? Or more specifically, how to build an outdoor arena? Well, look no further. Here is your one-stop-shop guide to building the perfect outdoor horse arena on a budget. Here’s How…
Building A Riding Arena
Being an eventer, and mostly a single, full-time working mum, whilst my husband is away working in the navy, I needed somewhere to train at home. I didn’t have time to travel to train my horse and needed a quick way to ride daily to be ready for competition. I needed an outdoor school. and I needed it on a budget!
Building a riding arena is simpler than it may seem. Don’t be fooled by contractors and grumpy workmen… believe me, I saw many frogs before I found an arena building prince! And for me, the cheapest route to building my riding arena, at the highest quality (and it was a high-quality arena) was to pick someone who wasn’t a specialist. The specialist riding school builders charged around £8k more in quotations. And for me, didn’t offer the best solutions! So here is my step by step guide to building a riding arena on a budget:
How Much Does It Cost To Build An Outdoor Arena
So, how much does it cost to build an outdoor arena? Well, I built a 30m x 40m arena for £17k. Knowing what I know now, I think I could get this down to around £14k to £15k.
Horse Arena Building Needs
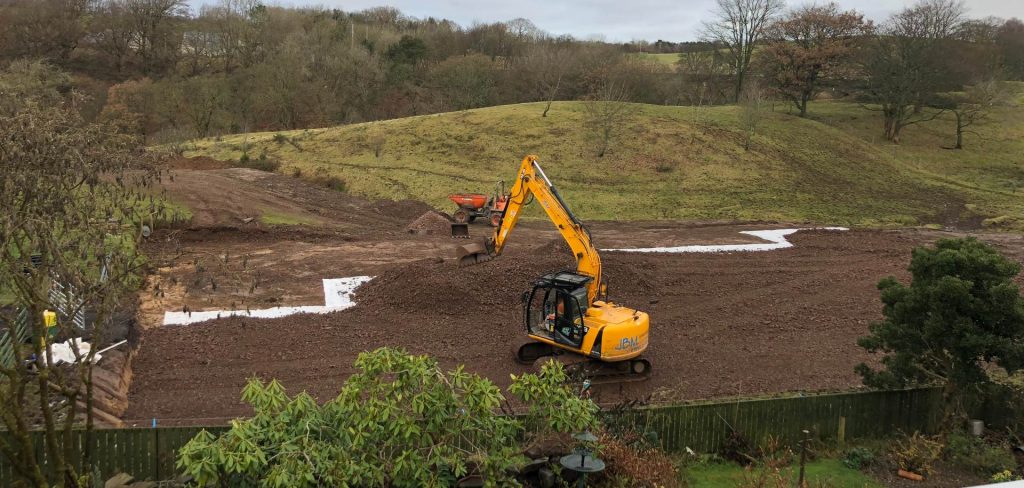
Step 1: Find a really good digger man
Don’t Google “arena builders” or ask people for contacts of people who build horse arenas. Instead, go out and ask for contacts for really good digger men. Ideally a one-man band, not a big contractor, who has his own machines and is willing to give you a daily rate.
A good digger man will hire himself out with his machine for around £35 per hour. Good ones are conscientious, will work 8 hour days, or until the job is done. Ascertain daily rate (including the machine), number and lengths of breaks, and daily hours with your digger man before committing! Mine is incredible. He starts at 8am and works until the job is done. He stops for 30 mins maximum for lunch. You wouldn’t believe how many digger men arrive at 9am, take an hour’s lunch, multiple tea breaks, leave at 4pm then finish on a half-day on a Friday. The hours I ended up paying workmen to sit around doing nothing and not get the job done properly was painful! Hence, I won’t work with bigger companies or contractors now.
So Find someone recomended, who:
- Includes his machine price in his daily rate (approx £280 per day, plus diesel). You will then have the cost of a dumper on top of this. Most will have a friend willing to drive the dumper for you cheap. They can then also help him with the laying of pipes and cutting of surface bales.
- Ideally someone with a tractor and trailer, who can bring and take back his machines himself, without needing to hire expensive haulage contractors.
- Works full 8 hour days, with agreed breaks
- Doesn’t knock off early on a Friday and leave a job unfinished.
- Also, is he willing to do other parts of the job? e.g. lay the pipes, membrane, etc. You don’t want a digger man sitting idle in a machine, whilst you have to hire other labourers to put things in place.
Make sure he has a laser level and advise that the arena must be flat as a pancake. You do not want any run on your school or your surface will shift.
Once you have your digger man you will need to plan the time needed. 2 weeks should be enough to complete the job. Budget £4k to £5k.
Step 2: Budget the elements needed
Outdoor Riding Arena Elements Checklist:
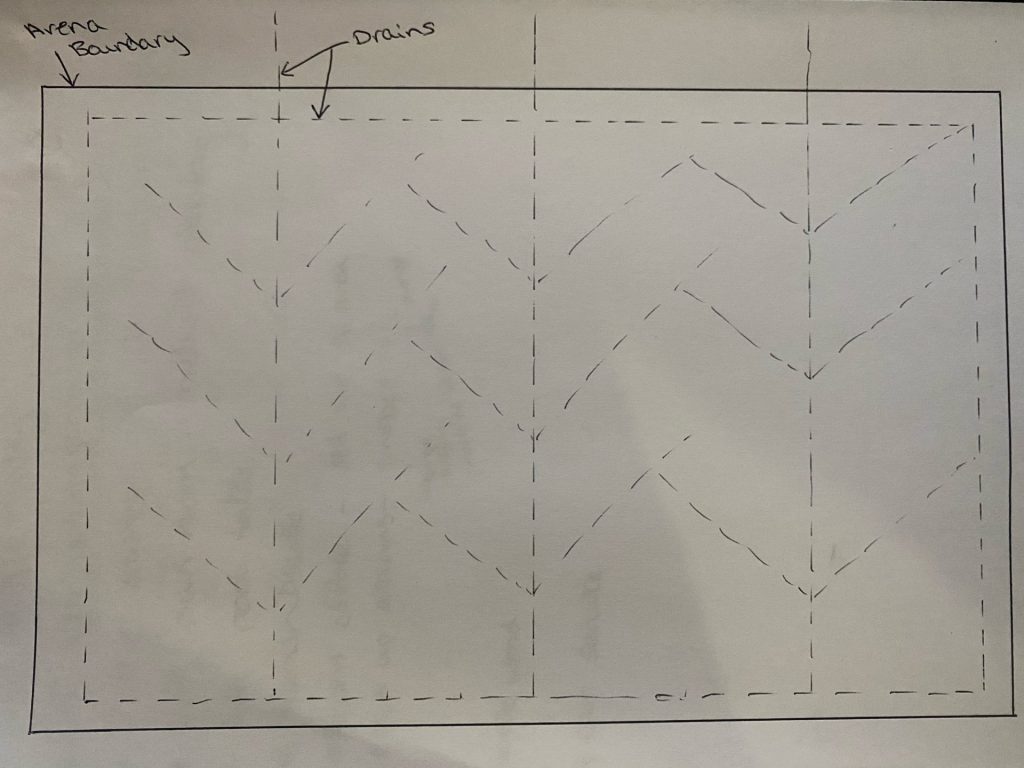
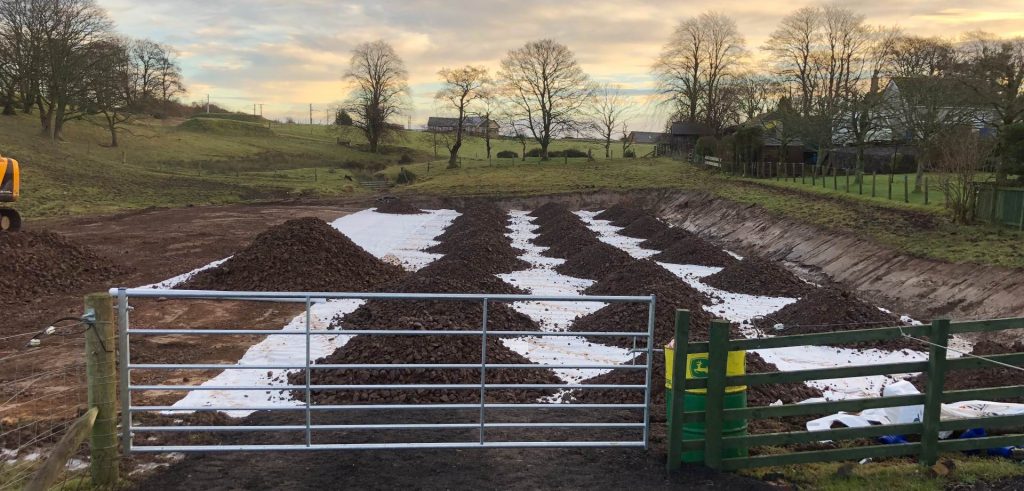
1. Great horse arena drainage layout:
Good drainage is essential. Never scrimp on this element… you will only end up paying for it again in the future. And face many days of missed riding due to a frozen surface or puddles! Place a boundary drain all the way around your arena. Dig this around a foot within your boundary fence. Decide where you are draining your arena too, then off the opposite side of this, run herring drains across the entire arena. These drains should all tie in together, contain large drainage piping, covered by good clean 20ml drainage stone. Here is a drawing of what this might look like:
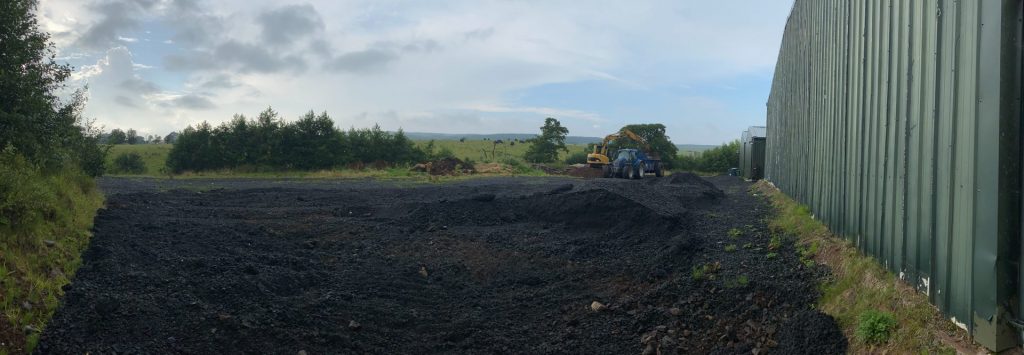
2. Riding Arena Bases, What Stone:
So, you will need a lot of stone! And this is a core cost in your project. First off, ask your digger man to work out the quantities of stone needed based on your arena sizing. This will include your 20ml draining stone, big stone (if you are digging out a field and need a base), hardcore to level out ready for the surface.
- Sub stone: If you are building on soil, mud, or in what was grassland (or in my case, what was marsh), you will need some big boulders/large stone to lay as a base. Again call around and see what you can get your hands on cheap. So, I managed to source rubble from a demolition company (it doesn’t matter too much if it is clean rubble or not (it’s going to be buried under your drains and under your surface stone). Otherwise, you need to source some big cheap stone from a quarry.
- 20ml clean drainage stone: shop around the big local quarries for the best price per lorry load. Ask for your total price delivered, including VAT. You will need around 40 to 60 tonnes (two or three lorry loads). These will fill your drains and keep your arena from flooding and freezing.
- Surface stone/hardcore: So, most would insist that you must use type one for this. For my first outdoor arena, I stuck with this for fear of poor drainage. I am just about to build a new outdoor arena at my new house. But, I this time have used cheaply sourced tar-plainings. The project isn’t finished yet, so contact us to see if this worked well – as it is a much cheaper option. Again, call around the quarries for your best price on type one. Or the roads depots for tar plainings.
Step 3: To membrane my school or not to membrane?
Well, this all depends on the surface you choose. If you go for a rubber and sand mix, then no, do not membrane. The membrane has a horrible habit of coming up through your surface in time and becoming a trip hazard. But, if you choose a pure fiber surface you may need a membrane to hold the fiber in place. Once you pick the best riding school surface for you, best ask your provider for their guidance as to what works best with their surface.
For my first outdoor riding school build, I didn’t lay membrane between the stone and the surface. But, we did lay membrane beneath the base stone. The spot I picked to build my outdoor riding school was particularly boggy. This membrane helped stop the base stone from moving.
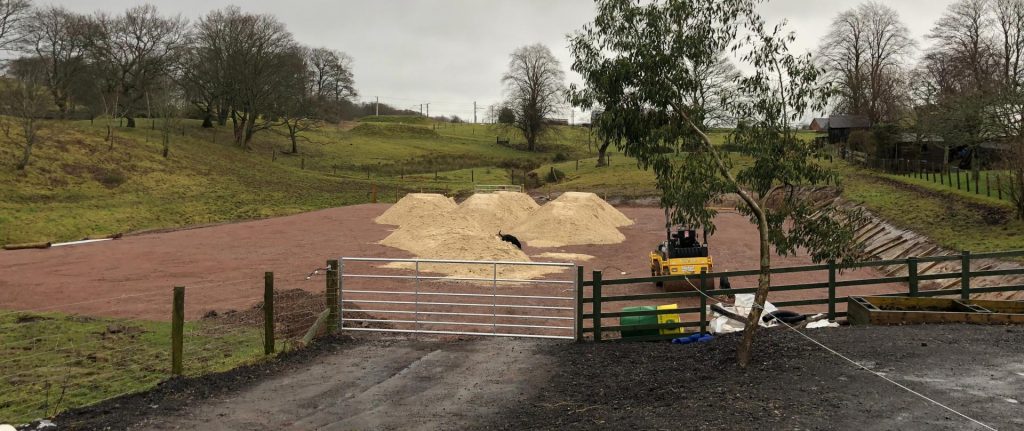
Step 4: Arena Surfacing
I have to say, my favourite surface is Springride (a rubber and sand mix). But, this is much more expensive at around £12k for a 40 x 30m arena. This also needs a little more regular harrowing. We are now trying Carpet Gallop fiber. This is much cheaper at around £5k for the same size arena and doesn’t need any expensive silica sand. It is harder to lay than the rubber sand mix but needs no harrowing. Just irrigation (hopefully covered for you by the rain). And rolling. We set up a homemade irrigation system for around £1k – whereas we were quoted around £10k for a company to install arena irrigation for us… I sense another blog to come!
Whatever surface you choose, be aware that it will take around 6 months to a year to fully bed in. At this point, maintenance levels will drop considerably. Ideally, you want to roll your new surface weekly when damp to encourage it to settle. And remember, it’s easy to top up a surface that needs more… it’s not so easy to remove the surface if it’s too deep! So, I would recommend buying the quantities advised by the arena surface company but put in slightly less. And then, when you need it, you can top it up. Your surface is going to be a little deep for the first few months until it beds in. So better to bed in less and add more later.
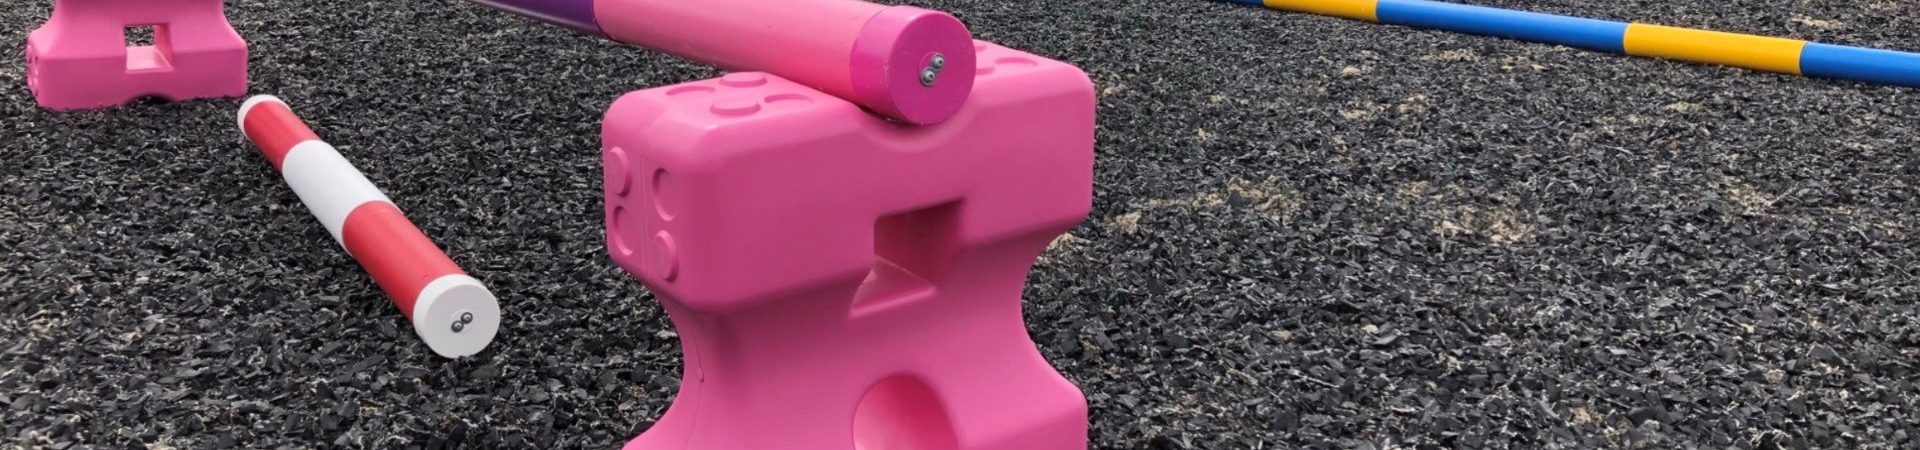
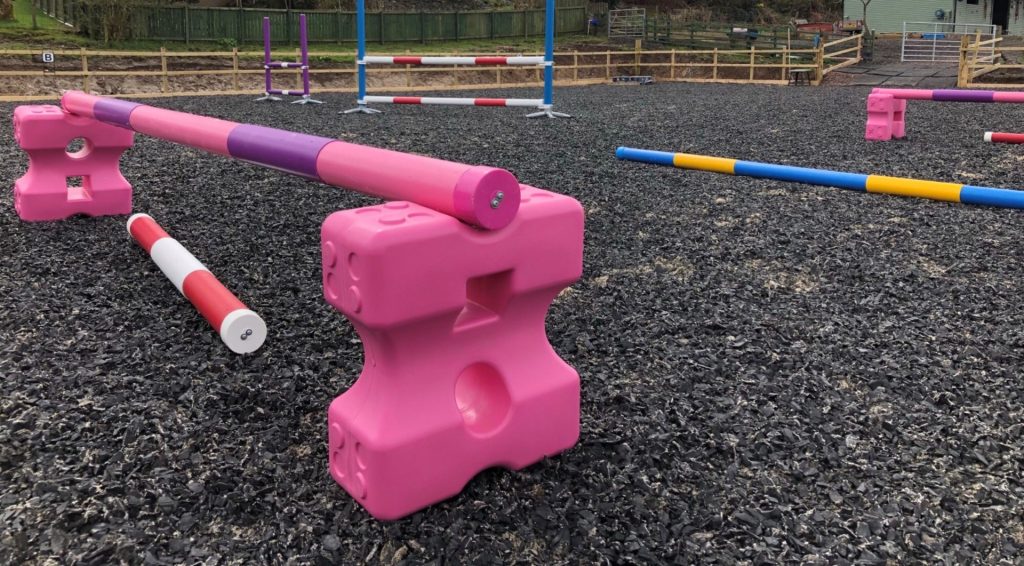
Step 5: Riding Arena Kickboards
So, these are a must to hold your surface in place. The best kickboards I have found are wooden roof purlins. Order these treated at or 3 x 9 inches, in 6meter lengths. Some people use railway sleepers (but these are much shorter, so need more labor to place and aren’t quite as deep. And as the purlins are so long, they end up cheaper alround. Another option is kerbstones, but these are very labor-intensive to lay, so can end up costing more.
Step 6: Riding Arena Fencing
For my first outdoor riding arena build, I added post and rail fencing, with 3 gates and a drop corner jump (the arena and this particular corner were at different levels. This cost me £3k. We had two rails and spaced the fence stabs 1.5m apart. We also had ten straining posts (one in each corner and two at each gate).
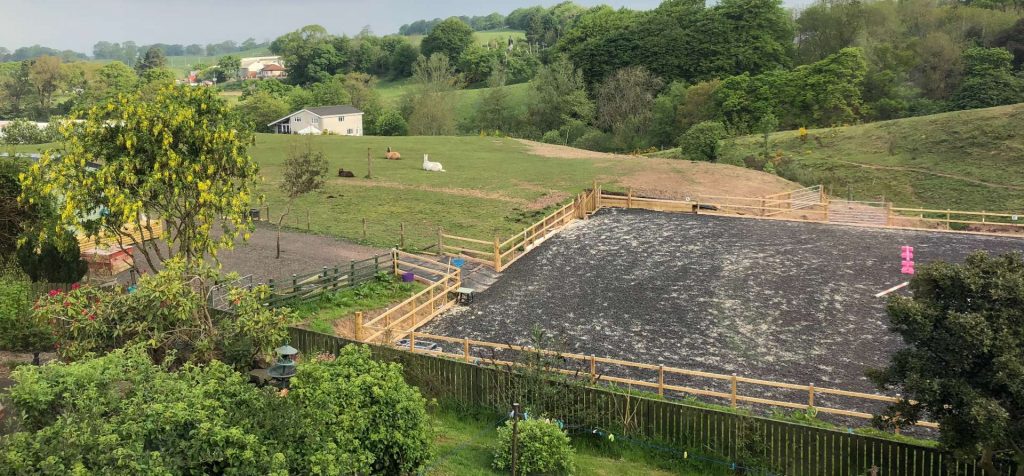
Before:

After:

For my second outdoor arena, we have decided not to fence. Fencing, whilst it looks nice and makes us feel safe, we do tend to bounce off it instead of relying on our riding to move around the arena. I’m not a fan of just riding the circumference of a school. And for eventing, I need to be able to ride a test without fences to hold my horse straight. So, for training purposes, we decided not to add a fence to this outdoor riding school. Contact us for more info, as this project is still in the process!
I hope this “how to build an outdoor arena” guide has been of help. But if you do have any questions, please do feel free to get in touch.